When I prepare to photograph in remote environments or high mountains, priority always starts with my own safety; without it, no expedition can be sustained. Therefore, before even fitting the camera in my backpack, I meticulously study the region, consult reliable weather forecasts, and conduct a detailed risk analysis. Additionally, sharing my itinerary with at least two people is part of the ritual.
There are many ways to prevent and recommended protocols to take care of your safety first, so I recommend studying this subject, seeking and taking courses, as in this text we will talk briefly about it. Right here on the blog, you can search for articles to learn more about the topic and find online and in-person training.
Starting with the basics, an important safety item is clothing. Dressing appropriately for extreme temperatures, wearing appropriate footwear and protective accessories such as gloves and glasses is fundamental. On the Gear Tips YouTube channel, you’ll find videos with valuable tips on how the three-layer system works:
Always carry adequate communication devices for remote areas — in many cases, a simple cell phone may not work due to a lack of signal. In these contexts, a satellite phone or satellite messenger may be the only way to ask for help. In Brazil, brands like Spot and Garmin offer reliable equipment that allows you to send messages, share your location in real time, and even trigger rescue services in case of emergency.
Additionally, carrying a good-quality GPS is essential, especially on less marked trails, in mountainous regions and without a cell phone network. These devices are fundamental for ensuring your safety, enabling you to communicate and be located quickly if something goes wrong. And since training is always welcome, I recommend an Orientation and Navigation course.
Additionally, be prepared for unforeseen events. Go with a contingency plan in mind, which includes alternative routes and information about natural shelters or rest areas available in the region. This strategy can be crucial for ensuring your safety if conditions deteriorate suddenly.
When planning your itinerary, inform friends, family, or colleagues about the route details and estimated return time. This communication not only creates a backup in case of unforeseen events but also allows rescue teams to be activated by someone else if an emergency occurs. If possible, establish checkpoints during the route where you can confirm your location and conditions.
I always send geographic coordinates of points along the route, and when passing through areas where it’s possible to use the internet on the cell phone, I take advantage to send an “everything’s fine,” “passing through such a place now”, “soon I’ll be without network again.” This is a good habit to take to all types of trails.
Prefer to always go with at least two more people and hire a guide whenever you need to because, besides everything, as Christopher McCandless would say, “happiness is only real when shared.”
And now, let’s get to photography!
Equipment Protection
First of all: perform a complete review of cameras, lenses, filters, and other accessories so you don’t run the risk of forgetting a memory card, for example, or having a surprise with some equipment that may not be working correctly. Charge all batteries, discharge all cards, and make a checklist. A simple way to test the photographic equipment you’re going to take is to take some shots at home. And if you’re going to photograph with your cell phone, delete applications that aren’t being used, free up the device’s memory.

Photo: personal archive
If you’re going on a long expedition, a portable solar panel can be useful to recharge electronic devices and batteries, ensuring you have enough energy to capture all desired images from beginning to end of the expedition since access to recharging can be limited in these environments. And for both camera and cell phone, I recommend you take a good power bank already charged and different cables and adapters.
Photographing in extreme environments, such as mountains or remote locations, is an exciting and unique experience, but it also requires special care with equipment. The climatic conditions of these places can affect both the performance of the adventuring photographer and the condition of cameras, lenses, and accessories, requiring careful preparation and adequate handling. Humidity, sand winds, rain, sea spray, high temperatures, or temperatures below zero can cause damage to your equipment; you need to know how to protect them in each situation.
Below 0°C, battery duration tends to decrease considerably, which can be a major challenge in high mountain environments. To minimize this effect, it’s recommended to keep spare batteries warm in the inner pocket of the jacket or underclothing, where body heat can keep batteries functional longer.
In deserts, places with negative temperatures, and other environments where temperature can vary drastically, your photographic equipment can be harmed, since ideally the camera should be maintained in a temperature range between 5°C and 40°C. These values are found in the camera manual, and even though they may present some difference from one equipment to another, the fact is that sudden temperature change can cause damage.
Exposing the camera to temperatures outside this recommended range can compromise its functionality and thus the quality of images. One of the greatest risks associated with this situation is condensation, which causes moisture present in the air to transform into water droplets inside the equipment, and this can occur when the camera is transported from a cold environment to a hot location suddenly or when the camera is being used in a humid and cold atmosphere.
Inside the camera, this phenomenon can be especially harmful, as droplets can deposit on the sensor, electronic circuits, and between lens components, compromising equipment functionality. Additionally, moisture in electronic contacts can cause oxidation and communication failures, resulting in malfunction or even permanent damage.
To avoid this problem, a simple and effective technique is to place the camera inside a closed plastic bag when going from a cold environment to a hot one and vice versa. Leave the equipment inside the bag until it adapts to the new environment temperature before removing it. The manuals say that this type of camera acclimatization should last for 20 minutes. This process significantly reduces the chance of condensation formation.
If you notice that condensation occurred inside the camera, do not use the equipment or remove the lens, memory card, or battery. Turn off the camera immediately and wait the necessary time for moisture to evaporate naturally. This process can take several hours, depending on conditions, and even after the camera is completely dry, it’s fundamental not to remove the lens or battery until the equipment reaches room temperature.
An excellent solution that can be allied to equipment moisture evaporation is the use of silica gel, a highly efficient desiccant. You can use this resource where condensation has already occurred to accelerate the drying process, and even use it just to store the camera and lenses in a hermetic bag or box at home or to transport the equipment. Regular use of silica gel is still recommended, even in daily routines with cameras and lenses. To maintain its effectiveness, replace or regenerate the sachets regularly, as they lose absorption capacity over time.
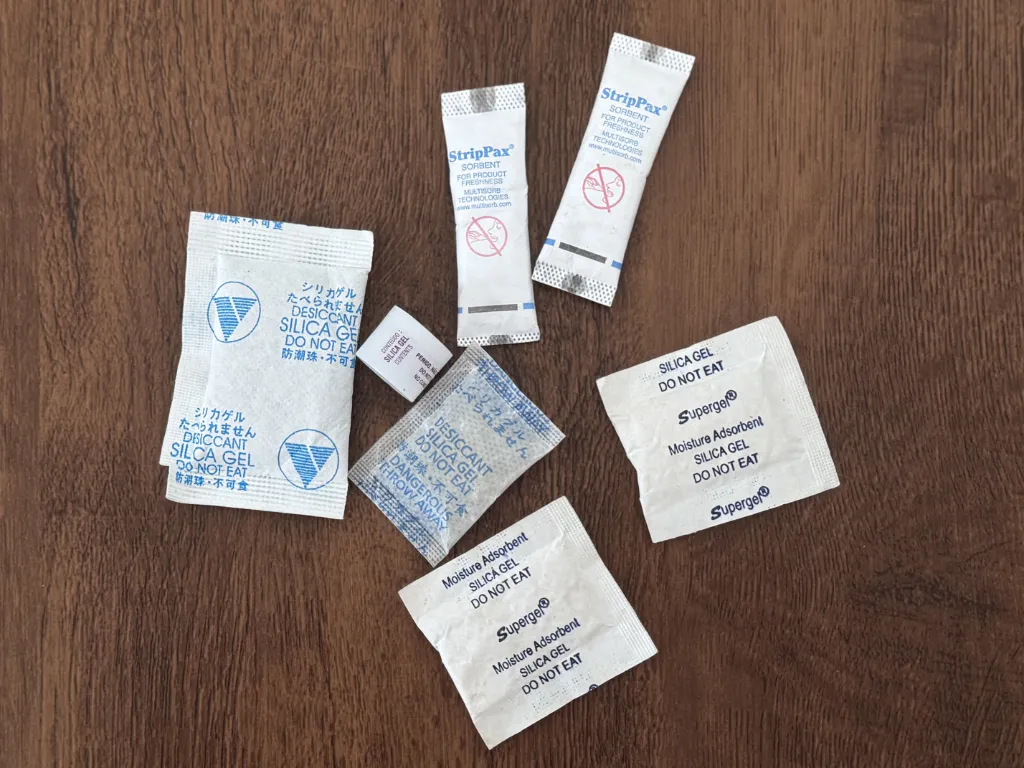
Photo: personal archive
After use, clean the equipment with products recommended by the manufacturer and store it in compartments with thermal insulation, preventing damage from condensation or freezing. When photographing in environments with fine particles, such as deserts or areas with strong winds, it’s essential to clean the camera and lenses as soon as possible. In this case, use soft-bristled brushes or specific kits for photographic equipment.
Reflected Light and UV
An important factor to consider in locations with snow or ice is light reflection, which can deceive the camera’s photometer, resulting in underexposure of images. This occurs because light reflected by snow can cause an incorrect exposure reading. To compensate for this effect, adjust exposure compensation to +1 or +2 EV (exposure value), which allows bright areas, such as snow, to have adequate details and the image to have balanced exposure. In the previous article, I explained in detail what exposure, underexposure, EV, etc. are.
At high altitudes, the more rarefied atmosphere results in greater incidence of ultraviolet (UV) radiation, which can affect, beyond exposure, the coloration of images. If the camera is directed at the sun, rays can concentrate at a single point on the lens, increasing the intensity of ultraviolet (UV) radiation, which can damage the lens sensor and compromise image quality. UV filters are essential to protect the lens and reduce the bluish effect that can be caused by excess ultraviolet radiation.
It’s also important to avoid leaving the camera exposed directly to both sun and extreme cold for prolonged periods, as this can damage sensitive components without this being noticeable at first. The same care should be taken with cell phones. Currently, smartphone cameras have sensors that help regulate the amount of light captured, which contributes aesthetically, but it’s still advisable to avoid direct sunlight incidence when thinking about electronic components.
Accessories
Another good practice to protect lenses and avoid damage caused by intense sunlight is using a lens hood, allied with the UV filter. The lens hood helps block direct light, reducing the risk of this type of damage and preventing unwanted reflections in images such as flare (brightness that forms spots, halos, circles, or light rays) and glare (dazzling or completely white reflections) in images.
Choosing the appropriate lens hood can be decisive for maintaining image quality and equipment integrity. Various models serve different needs: the cylindrical lens hood is ideal for telephoto lenses, efficiently blocking lateral light without compromising the field of view. The petal model proves more suitable for wide-angle or standard zoom lenses, reducing flares without causing vignetting.
In extreme environments, such as high mountains, portability becomes essential, and retractable rubber lens hoods stand out for this practicality. Made with flexible material, they can be easily retracted or expanded to suit various lighting conditions, besides being foldable to save space when not in use.
Even on cloudy days or with indirect lighting, this accessory helps avoid unwanted reflections, ensuring images with greater contrast and sharpness. Compatibility with filters, and the possibility of opting for reversible models that facilitate storage, reinforce the importance of a quality lens hood, designed specifically for each type of lens, ensuring maximum efficiency and safety in adverse conditions.
Besides improving light control, the lens hood plays a crucial role in physical equipment protection in challenging environments. In mountain trail expeditions, it acts as a barrier against branches and other debris that can damage the lens. Not to mention that in case of a fall, the lens hood will be the first to touch the ground, potentially protecting the lens front glass against scratches and cracks.
Transport and Storage
Transporting the camera and accessories should also be done carefully. Keep the camera protected, if possible, inside an impact-resistant case. This will help avoid damage during transport, especially on rough terrain. Avoid carrying the camera hanging from your neck for long periods, especially at high altitudes, as constant swaying can cause physical wear and increase the risk of accidental impacts.
Another important care when transporting the camera is ensuring it’s well protected during vehicle transport or in situations where impact might be stronger, such as when the backpack is placed on the ground forcefully. Using backpacks specific for photographers, with padded compartments and additional protection, is an option for hiking.
I recommend a Camera Box from Deuter, which stands out for offering complete and versatile protection. It has a fully padded insert that keeps your camera and accessories safe and can be used both as an independent item and inserted into a cargo backpack. Its design allows flexible padding configuration with dividers that adjust according to equipment size and need, protecting it from shocks and dirt. It accommodates a camera with a mounted lens and up to four additional lenses or accessories, and the best part: the Camera Box’s 580g doesn’t weigh down the backpack.

Deuter Camera Box One – Photo: personal archive
In remote locations, such as deserts or coastal regions, the presence of dust and sand is a constant concern. These particles can enter cameras and damage internal components, such as the image sensor and lens. Using protective covers specific for photographic equipment is an excellent way to keep the camera safe, especially if they’re made of waterproof and resistant materials, which offer additional protection in hostile environments or if you’re still photographing in humid locations, such as at the beach or near bodies of water. I usually use waterproof bags of various sizes; they are very resistant and suitable for use on boats, kayaks, and trails in the rain.
When planning what to take, it’s fundamental to prioritize only equipment really necessary for desired records. If you’re transporting various equipment, it’s fundamental to distribute weight in a balanced way in the backpack. This helps avoid excessive fatigue during the walk, besides minimizing the risk of injuries. Ideally, distribute the load so that heavier items are close to the back and centralized in the backpack, maintaining a stable center of gravity.
Remember that every gram counts on long walks, so the balance between photographic material quality and load lightness is what ensures a more efficient and pleasant journey.
Finally, always remember that your safety is the main foundation of any photographic expedition. Taking care of equipment is essential, but nothing compares to the importance of being physically and mentally prepared for nature’s challenges and thus recording truly memorable images.
This post is also available in: Português (Portuguese (Brazil)) Español (Spanish)