As some say, the adventure begins the moment we plan everything and separate our gear to embark on a new journey.
Two things are essential to avoid losses and hassle when packing your backpack: organization and cleanliness. Keeping your gear well organized and properly stored makes your life much easier when preparing for your next adventure. Cleaning is also crucial to avoid damage from moisture, mold, or even insects.
Maintenance and organization go hand in hand and should work in a constant cycle. That is: you return from an adventure, inspect and clean your gear, store everything in an organized manner, and perform regular maintenance on your gear and storage spaces. This cycle repeats every time you return from a hike, trip, or camping.
1. Clean everything before storing
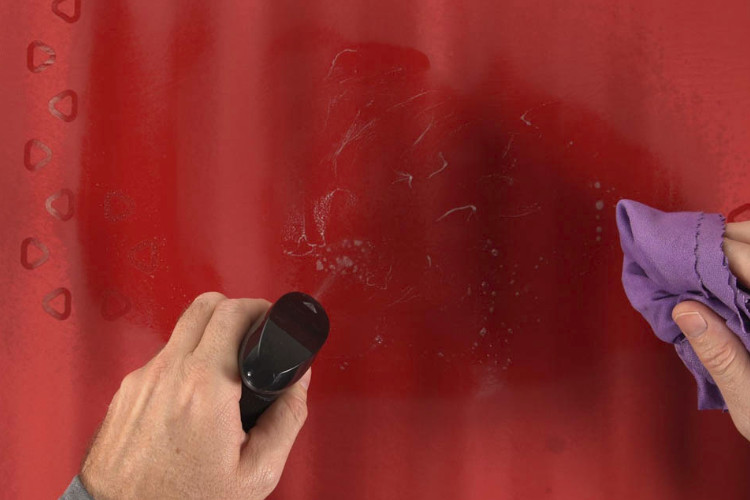
NEVER store your gear dirty or wet. Before even thinking about putting anything away, thoroughly clean your camping and hiking gear. Remove mud, dirt, sand, food scraps, wash, and dry everything very well.
2. Start organizing – separate your gear by category
Now that everything is spotless, clean, and dry, start organizing all your gear. You can classify them into two categories:
* Main gear (items that apply to more than one sport – tents or backpacks, for example);
* Activity-specific gear (bike, climbing, diving, etc.).
From there, divide everything into smaller piles:
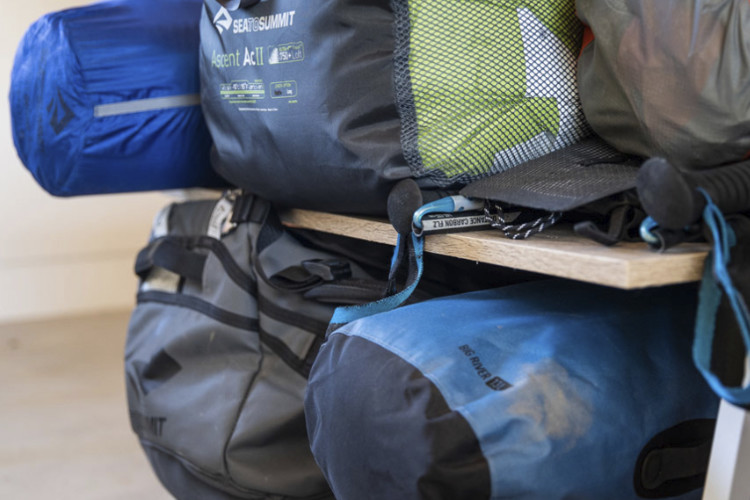
One pile of main gear: sleep system, tent, kitchen, hydration, essential camping items (first aid kits, flashlights, hygiene products, hammocks, etc.), backpacks, bags, dry sacks, and storage bags.
And one pile for each activity: separate the specific items for each sport (bikepacking, climbing, skiing, water sports, trail running, and car camping – for example).
3. Let go
During the sorting process, did you find some gear that’s been unused and forgotten in a corner?
Many people buy gear and then leave it on a shelf. If you have unused equipment, try selling or donating it. This will help declutter your space and make organizing easier.
4. Find the right space for your gear
Most of us don’t have the ideal or even enough storage space, but many people also don’t optimize the space they do have in the best possible way.
If you don’t have the luxury of a large garage or a room just for gear, get creative and optimize smaller areas. Check parts of your wardrobe, office, or laundry cabinets. Never underestimate the storage potential under your bed – especially if it’s a box-style bed. A shelving unit can also be a great option for storing larger gear like tents or sleeping pads.
Never choose a space that is too hot or humid. Both high temperatures and moisture will damage your gear, so avoid shelves or cabinets that are exposed to direct sunlight or located in damp environments.
5. Keep your storage space clean
You spent all that time washing your sleeping bag, cleaning your hiking boots, and creating space. Now, don’t put that clean gear in a dirty place, right?
Clean the entire area you’ll be using and don’t forget the shelves, boxes, and drawers. This also helps ensure there are no signs of moisture or mold – or any type of insects. Do a deep cleaning of your storage space sometimes, and in between the big cleanings times you can do quicker maintenance cleanings. That way, you avoid things getting out of hand or giving unwanted bugs the chance to settle in and ruin your gear.
An important detail: after cleaning your shelves, drawers, or boxes, leave them open, so any remaining moisture can dry completely before storing your gear.
6. Choose the right accessories to organize your gear
Clear boxes
Some smaller gear fits perfectly in clear plastic boxes. You can use boxes of different sizes to store items in smaller or larger spaces, and they can also be labeled to make identifying contents easier. Preferably, choose boxes with lids.
Separate gear for each sport into different boxes. Then, when you need your trekking gear, just grab that box and everything you need is already in there. Measure your spaces and write it all down before heading out to buy boxes – that way you don’t end up buying ones that don’t fit.
Boxes also have another advantage: they make loading gear into your car quicker and more organized. That’s great for trips where you park close to your campsite or go on road trips.
STORING MERINO WOOL, SLEEPING BAGS AND JACKETS
If you’re storing anything made of merino wool for a long period, consider using a vacuum bag. The same goes for less-used backpacks. As for sleeping bags (synthetic or down) and jackets, they should be hung vertically or laid flat on a wide shelf. Never store these kinds of items in compression sacks – they damage the fibers and down. Use compression sacks only for outdoor activities, never for long-term storage.
Liked the vacuum bag idea? Then check out this video where we explain how to store less-used backpacks using vacuum bags.
Use baskets for long items
If you have trekking poles, paddles, skis, tripods, or any other long items, store them upright in a tall basket. This minimizes space usage and keeps them accessible.
Backpacks
Backpacks are versatile – they can be hung on the wall, stored in a closet, tucked into a corner, placed on top of a cabinet or under the bed. Choose the solution that best fits your space.
Care with electronics
Make sure to remove the batteries from all electronics before storing. Batteries can cause issues if left inside devices for too long. This can damage the device or leave you in trouble mid-hike if you didn’t check before heading out. Get into the habit: always check battery levels before a trip and bring extras for all your gear.
Electronics can also be stored in plastic boxes. You can use silica gel packets to help control moisture inside those boxes, if needed.
Bottles and hydration systems
Don’t store your bottles or hydration systems with any moisture inside. And even if they are 100% dry, always check them periodically to prevent mold. If you use these items often, you can even store them filled with water in the fridge. This is a great option for runners or cyclists who train regularly.
Speaking of which, in the video below you’ll see how to properly clean a CamelBak hydration reservoir. The tips apply to other brands as well.
Clothing in general
Clothing is best on hangers and shelves, but can also go in boxes. If possible, keep jackets and sweaters hanging for easier access and inspection. Pants and shorts can go on shelves or in drawers. Socks are best in drawers, along with gloves, hats, bandanas, and other small items. If you live in a very humid place, try using dehumidifier products sold in supermarkets – they work well alongside regular storage checks. In fact, these dehumidifiers can be used in any cabinet or drawer where you store gear.
BE CAREFUL WHEN HANGING HEAVIER JACKETS
Some heavier jackets don’t do well on thin hangers – these can cause marks or distort the fabric due to the weight. If you’re hanging heavier clothes, try using wide-shoulder hangers like those used for suits.
Climbing gear
Climbing gear like quick draws, carabiners, belay devices, ropes, harnesses, slings, ice tools, and trad gear can be hung. This makes them easier to find, organize before a trip, and store after use. Follow the same basic rules: avoid damp, overly hot areas or places exposed to direct sunlight.
Footwear in general
Footwear can be stored in a corner of the room or on open shoe racks to allow better ventilation. Be sure to clean your shoes thoroughly after returning home. Remove the laces and insoles, clean off mud or sand, and let them dry completely before storing.
7. Sort by season
If needed, organize boxes and clothes according to seasons. This way, summer gear stays more accessible during the warmer months, while winter gear goes on higher or rear shelves – and vice versa when winter comes.
When organizing on shelves, consider the weight of each box
Keep heavier boxes on the floor or lower shelves to avoid needing a ladder to lift them. On middle shelves, store lighter gear and things you’ll use during that season to keep them accessible.
Place lighter, less-used, or off-season gear on higher shelves.
8. Pay attention to expiration dates
Keep an eye on the expiration dates of your first aid kit items and freeze-dried or thermos-processed food. Place shorter-dated items up front and longer-dated ones in the back. Get into the habit of taking items from front to back, and pay attention when adding new packages to your stock.
9. Get used to checking stored gear
From time to time, take out your boots, clothes, and gear to air out. This can be indoors or outdoors, but always in the shade and in a dry place. Check all clothing, sleeping bags, tents, pads, backpacks, zippers, and other items that could be damaged in storage. Maintain what’s necessary and take the opportunity to inspect your boxes, cabinets, shelves, and drawers.
10. Watch out for moisture
Moisture is terrible for your outdoor gear. It will damage electronics and cause mold and mildew on fabrics. Moisture can even break down the PU coating on your tent or backpack and make it sticky.
So check everything carefully to make sure it’s 100% dry before storing. Use dehumidifying/mold control products inside boxes and cabinets if necessary. And never go too long without checking your gear – the more humid your location, the more attentive you must be.
This post is also available in: Português (Portuguese (Brazil)) Español (Spanish)